 |
| From Becoming martha pictures |
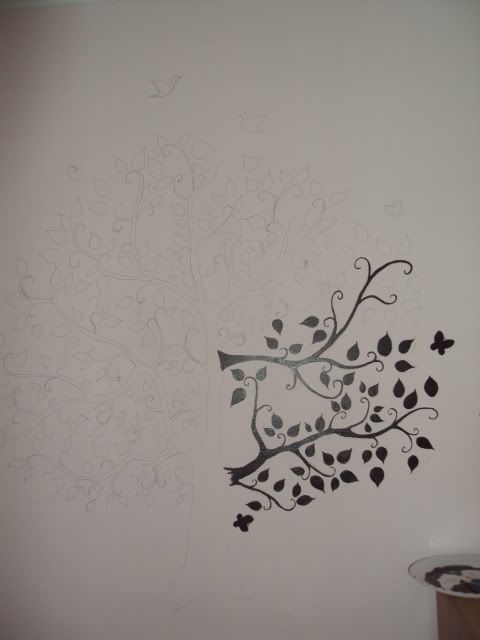
Well I had a little time tonight after the kids went to bed, so I figured I would knock out my first tutorial! Let me start by saying this is a big feature, so you really want to make sure you choose the right tree or image for you. Make sure it is something you LOVE, because it is going to be a bold statement in your room! I just googled "silhouette tree" to find one I liked. Ok now that you have a image, you need to print it out on clear overhead projector paper (or vellum paper) . Next you use a overhead projector to draw the rough outline up on the wall.
Here is what mine looked like traced in pencil on the wall.

I used cheap craft paint brushes and black semi gloss paint to fill in the silhouette


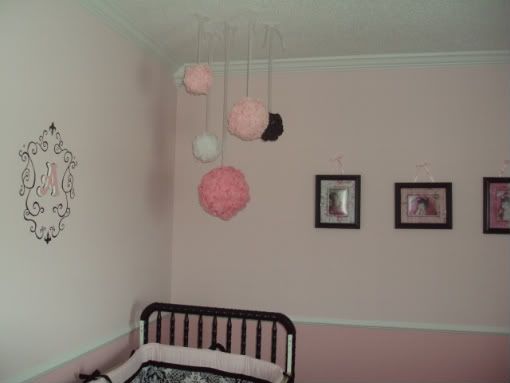
I used my Cricut to cut out the frames in two different tones of silver scrapbook paper. I layered them together, added a little distress ink to the edges, and used a pearl stick pin to hang them on the tree. I also glued on small diamonds to tie it into the monogram on the other wall.

I am so happy with how it turned out! Abby loves going up to it now and pointing out her Papa.
* If you have any questions just leave a comment! :D
Thanks for stopping by
Jeni

My favorite........
ReplyDeletethis is absolutely stunning. it looks so vintage but with a modern twist - i really like it!! makes me wish I didn't live in rented accommodation... otherwise i'd be getting the paint out! x
ReplyDeleteThat's really beautiful!
ReplyDeleteA beautiful tree. I love this idea.
ReplyDeletewhat a beautiful idea!
ReplyDeletelove this tree... i haven't been able to find this particular silhouette... can you post the site you got it on?
ReplyDeletedid you use the same technique on the monogram?
thanks for sharing!
Great project - beautiful! So creative - lovely design and great craftsmanship! I'm a new follower :)
ReplyDeleteSpotted your tree via I heart Nap time... your 'tree' just simply standout of the crowd...admired your creativity and lovely craft work! Do drop by and check out at http://meijosjoy.blogspot.com
ReplyDeleteThis is so cute! Love it, thanks for sharing!
ReplyDeleteThis is such a good idea! I love how it looks! Thanks for sharing!
ReplyDeletewww.modernwivelyhood.blogspot.com
Great idea! It turned out so beautifully!
ReplyDeleteI love the added frames for the names - really cute nursery decor!
ReplyDeletewonderful! we are painting a similar tree in the nursery of my 6 months old. love it.
ReplyDeleteWhat a great idea. Thank you for linking up at http://diyhshp.blogspot.com
ReplyDeleteI'm so impressed! You really did an amazing job tracing it out and painting:)
ReplyDeleteThis is so beautiful! I wish I had an overhead projector!!
ReplyDeleteHi, Jeni! I've pinned this in Pinterest and featured it today here. Please feel free to grab the feature button on my sidebar and thank you so much for linking up in my blog party :)
ReplyDeleteWhat a beautiful idea, I love how it turned out, I think it is so neat you used an overhead! The frames are perfect too... Thanks for showing off!
ReplyDeleteCarlee
www.ladybirdln.com
This is completely charming! I absolutely LOVE it! Thanks for sharing!
ReplyDeleteHi There! Could you please email me at uniquebabygear at bellsouth.net to discuss my doing a feature on your baby nursery ideas? Thanks
ReplyDeleteThis turned out a-maz-ing! Jeni!! Awesome job! The frames, gems and pearl picks are super sweet!
ReplyDeletevery beautiful!
ReplyDeleteawesome, but I do not have an over head projector. you did great...love it.
ReplyDeleteget so much inspiration by visiting these blogs. Ladies you all have Talent.
Thanks
Chris
http://turnedgypsy.blogspot.com
The tree looks beautiful. Very neatly done.
ReplyDeleteThanks for linking up at Tea Time Thursdays @ Kreative Korner and adding to the fun. The party for this week is going on... hope to see you there again :)
http://tanyaanurag.blogspot.com/2011/08/tea-time-thursdays-4.html
Love it!!! I want to do it in my daughters room but need a projector
ReplyDelete